
AWC field repair progress
Cracked concrete around railing posts: the repair sequence
Cracks at a railing post involve both the surrounding concrete and the post connection. Follow this field example from the original coated corners through preparation, patching and a resurfaced top before paint.
Repair progress only. Railing/post repair is still required and remains a separate part of the scope.
What the photos show
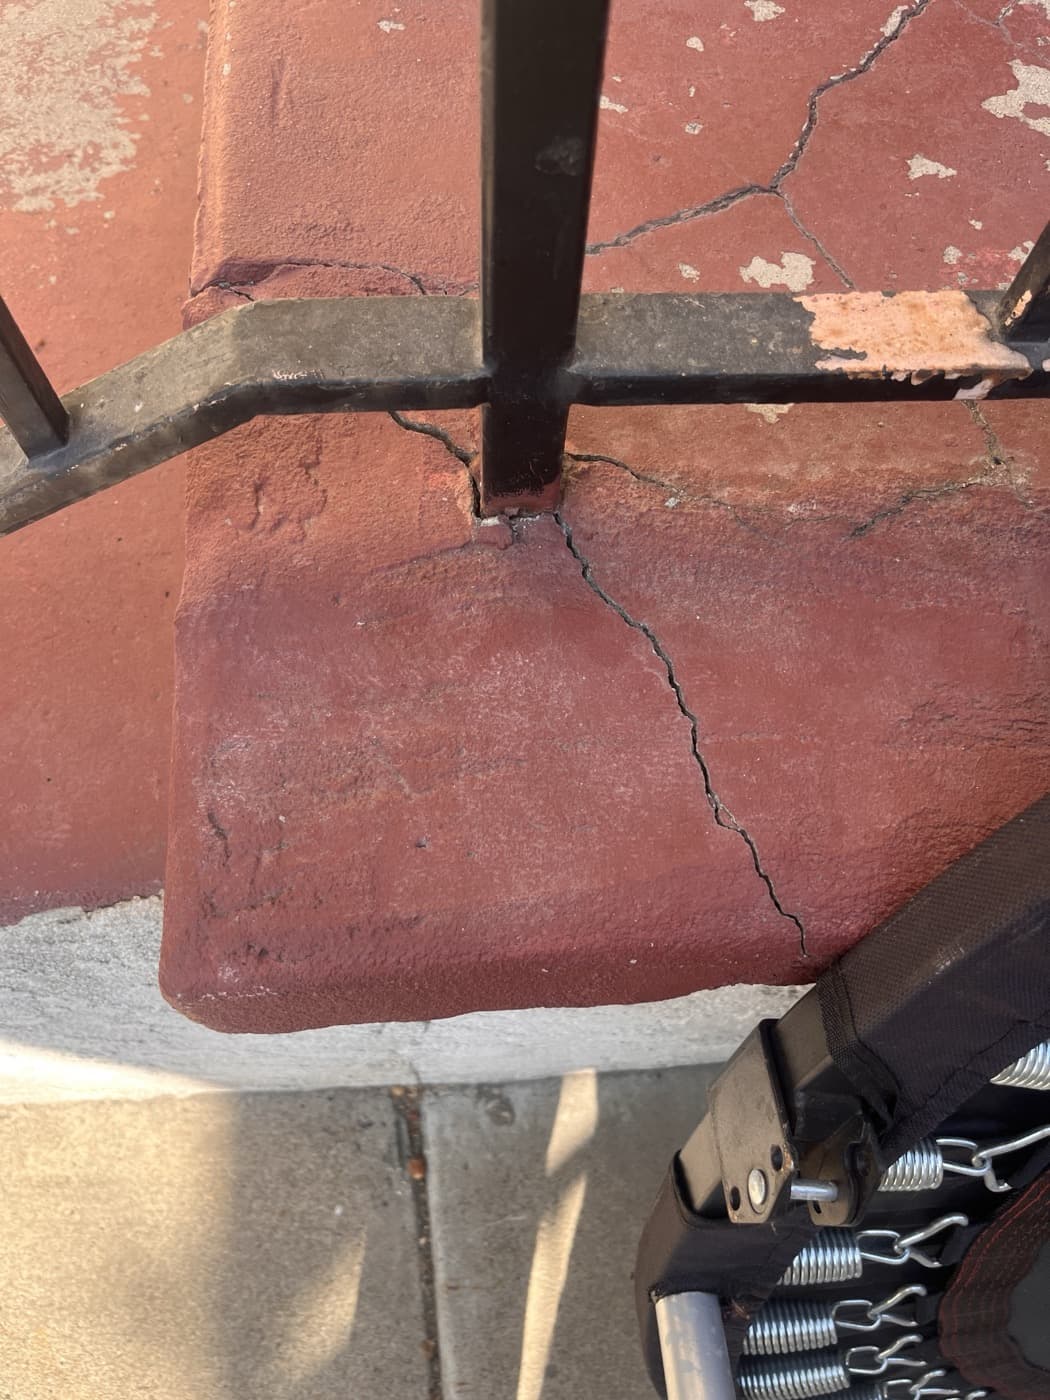
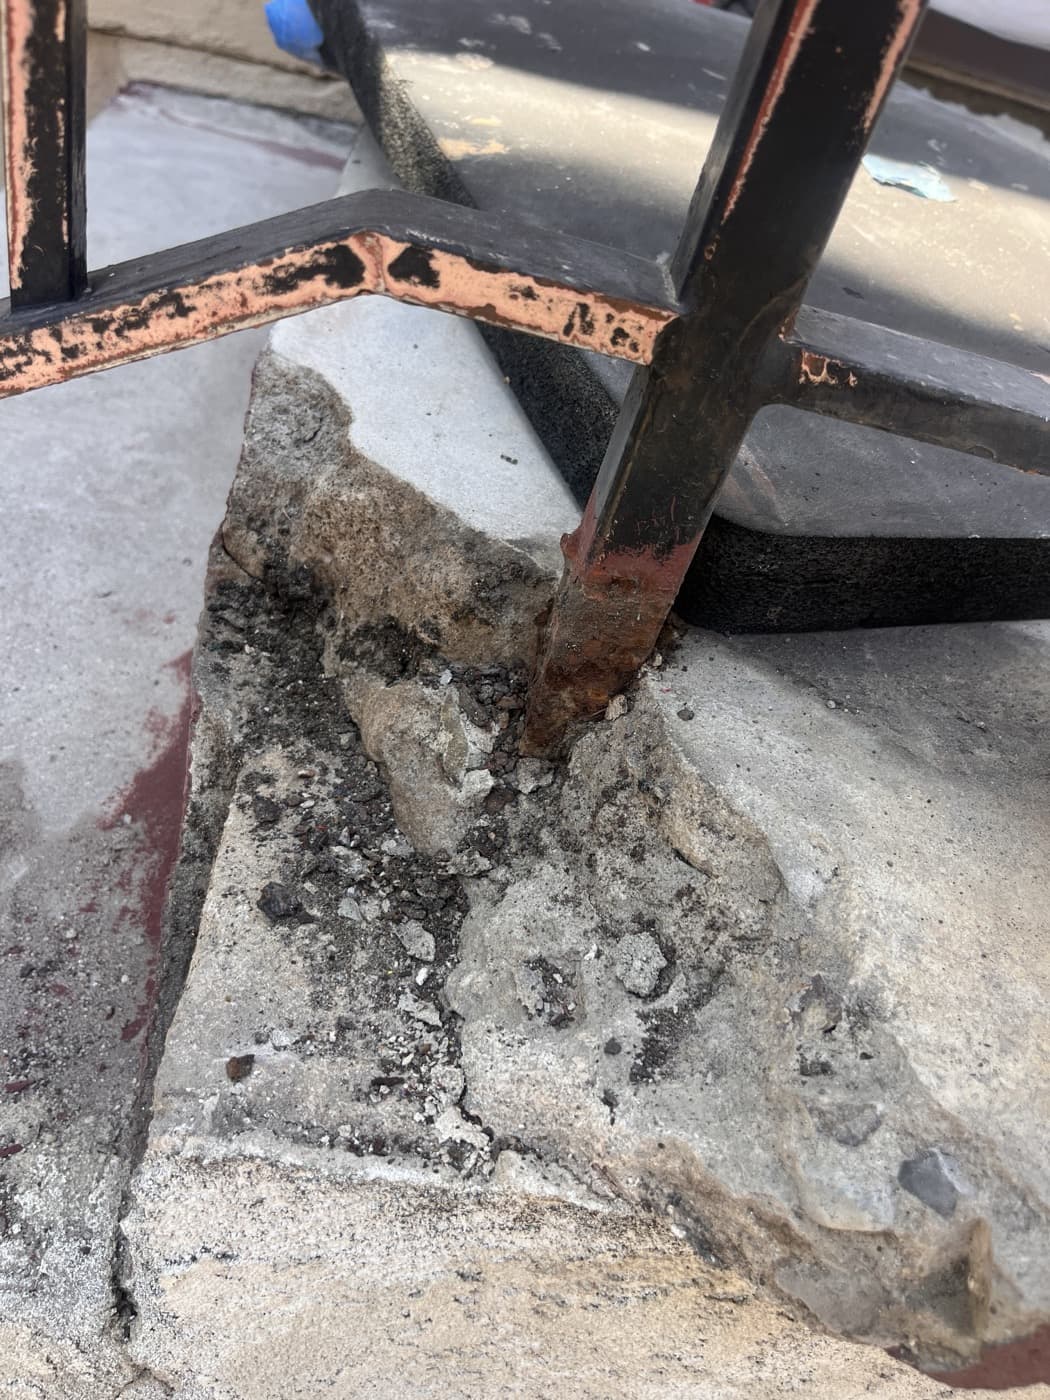
From damage to surface preparation
Stage 1
Document the cracks and post connection
The original red-coated concrete has cracks extending from the black railing posts toward the corners. Photographs show the visible condition; they do not establish the cause, damage depth, or post anchorage condition.
Stage 2
Open the repair area and review what remains
The preparation photo shows exposed concrete and an opened area around a post. Removal limits and the repair method depend on the concrete found during field review. Covering the original coating would hide these conditions.
Stage 3
Patch the defined concrete areas
The video shows patching in progress. A written scope should define removal, preparation, repair boundaries and any related metal work. The footage does not identify a repair product or establish a suitable method for another property.
Stage 4
Review the resurfaced top before paint
The later footage shows a resurfaced top before paint. A more uniform surface is one stage of the work. Railing/post repair remains required and must be addressed separately; these images do not establish final completion or safe return to use.
Watch the repair progress
51-second field sequence. Select play to load the video, or use the direct YouTube link.
Concrete corners and railing posts: repair progress
Cracked coated corners, preparation, patching and resurfacing before paint. Railing/post repair is still required and remains separate from this concrete progress example.
Open repair video on YouTubeVisual summary
The footage moves from cracked red-coated corners beside black railing posts to preparation, concrete patching and a resurfaced top before paint. Railing/post repair is still required. The still photos and stage descriptions above provide the key visual information without playing the video.
What this means for your repair decision
A surface treatment alone cannot settle questions about a damaged post, its connection, or the surrounding concrete. Before selecting localized repair, resurfacing or replacement, review the extent of cracking, remaining sound concrete, water entry, previous repairs, movement and the railing condition. Site verification may change the removal limits or require additional professional review.
Send photos that help define the next step
- A wide view showing the stairs, landing or walkway and nearby railing.
- Close-ups of each cracked corner and the post where it enters the concrete.
- Side and underside views, if visible safely from an accessible location.
- Photos of flaking finishes, rust staining, wet areas and previous patches.
- The property address, how the area is used, and any changes noticed over time.
Do not load or shake a damaged railing to demonstrate movement. Keep people clear of visibly loose railings or unstable concrete while the condition is reviewed.
When site verification is needed, $250 Site Evaluation + Written Bid Package protects the time needed to check visible conditions and prepare a written scope. The $250 is credited back if the construction project is approved within 30 days.
Start with the damage
Show us the concrete and railing condition
Text a wide photo, close-ups, the property address, and what has changed. Call Austin at 619-912-0486, or use the project form if you prefer. You can text photos without filling out a form first.
Work subject to attached T&C if approved. Hidden damage, code issues, access problems, or owner changes may require a written change order.